
- 打开网站https://certbot.eff.org/
- 选择服务器系统和软件环境
- 以nginx+ubuntu为例:
# 1. 安装需要软件$ sudo apt-get update$ sudo apt-get install software-properties-common$ sudo add-apt-repository ppa:certbot/certbot$ sudo apt-get update$ sudo apt-get install python-certbot-nginx # 2. 如果你已经安装有nginx,请关闭$ ps -ef | grep nginx$ root 21365 1 0 19:09 ? 00:00:00 nginx: master process nginx -c /etc/nginx/nginx.conf$ www-data 21380 21365 0 19:09 ? 00:00:00 nginx: worker process$ root 21443 18893 0 19:11 pts/1 00:00:00 grep --color=auto nginx$ kill -9 21365$ kill -9 21380# 3. 加密开始前还要确保443端口开放,并且前往步骤1中certbot自动安装的nginx中配置要加密的域名站点,默认安装在/etc/nginx目录,增加站点配置:server { #开启80和443端口 listen 80; listen [::]:80; listen 443 ssl; listen [::]:443 ssl; root /var/www/html; index index.html index.htm; server_name baidu.com; #你的域名 location / { try_files $uri $uri/ =404; }} - 开始加密
$ sudo certbot --nginx
- 加密过程截图

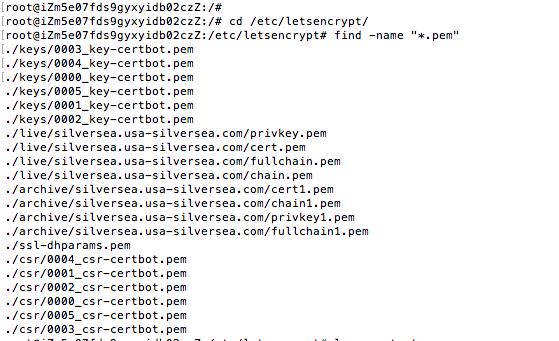
- 查看生成的证书
- 关闭certbot自动安装的nginx

- 查看certbot自动生成的证书配置
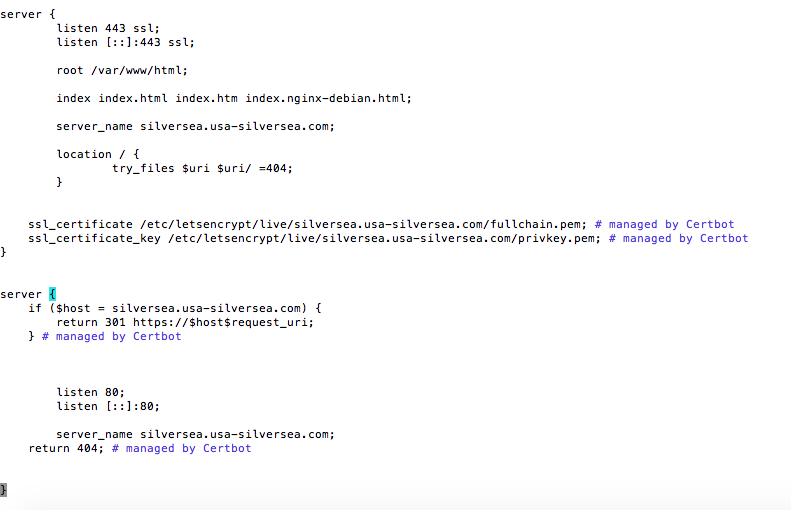
- 将生成的证书配置拷贝到你的nginx对应域名配置中, 并重启nginx即可
- 享受你的https吧!!
- 更新证书时间
$ sudo certbot renew --dry-run
- 删除证书
$ certbot delete --cert-name yourdomain
博主自己作品推荐:
西谷盒子:自带公网IP、即插即用、全端口开放、花生壳替代品 https://cigobox.taobao.com